How to put an outdoor clothes airer spike in the ground

If you’ve just bought a rotary airer, you might be wondering the best way to secure it firmly in your garden. Without the right installation, your clothes airer could wobble, tilt, or even fall over in the wind.
The good news? Learning how to put a clothes airer spike in the ground is simple, and once it’s in place, you’ll have a stable and reliable spot for drying laundry outdoors.
Step 1: Choose the right location
Start by picking a flat, open space in your garden where clothes will catch both sunlight and airflow. Avoid areas too close to walls, fences, or trees, as these can block the breeze or create shade. Make sure there’s enough room for the airer arms to spin freely when it’s fully open.
Step 2: Dig the hole
Next, dig a hole that matches the depth of the spike. A spade’s width is usually enough, but the exact size will depend on your model. Clear out any stones or roots, as these can prevent the spike from sitting securely.
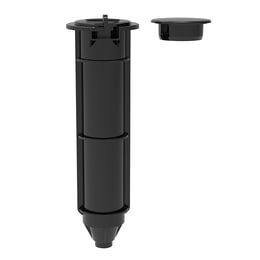
Method 1: Installing the Vileda Screw Socket into Soil
Vileda offers two installation options for rotary dryers: the ground socket (suitable for concrete installation) and the screw socket, which is designed for easy installation directly into soil — no hammering required.
To install the screw socket properly:
Choose a level area of soil where you want to place your rotary dryer.
Use a metal rod or screwdriver through the eye of the socket to help you turn it.
Screw the socket into the ground by rotating it clockwise, applying steady pressure until it is fully secured and the top is flush with the ground.
Make sure the socket is perfectly vertical by checking from multiple angles as you go.
Once installed, insert the rotary dryer pole into the socket and check stability.
Important: Do not use a hammer or mallet to install Vileda sockets. The ground socket must be embedded in concrete, while the screw socket is designed to be twisted into soft ground only. Both options provide a secure base when installed correctly.
Method 2: Securing with concrete
For maximum stability, concrete is the stronger choice.
Pour a few centimetres of gravel into the hole for drainage.
Position the spike vertically and hold it steady.
Mix a bag of postmix concrete to a semi-dry consistency.
Fill the hole around the spike with the concrete, tamping it down as you go.
Use a spirit level to ensure the spike stays perfectly vertical.
Allow the concrete to set fully before attaching your airer — this usually takes several hours.
Step 3: Attach the airer
Once the spike is secure, simply slot the rotary clothes airer into place. It should fit snugly and lock in. If you’re using a high-quality model like the Vileda SupaDry Hoist, you’ll benefit from a heavy-duty, height-adjustable frame that’s built to last; and it’s easy to install!
Final tips for success
Always double-check the spike is vertical before finishing — even a slight tilt can affect balance.
If your soil is very soft, concrete is the safer option.
Allow enough space around the airer for bed sheets, towels, and larger items to hang freely.
By following these steps, you’ll master how to put a clothes airer spike in the ground and enjoy a strong, secure base that keeps your rotary dryer steady for years to come. With the right installation, drying outdoors becomes not only more practical but also more enjoyable.